How to Slipstream Your SATA Drivers Into a Windows XP Installation CD Using nLite
140,479 views
15 Editors
Edited 9 weeks ago
A common error encountered by Windows XP fans when attempting to downgrade their new laptop from Vista to XP is a STOP error, also called a BSOD (blue screen of death). This happens when the installer looks for a parallel ATA (Advanced Technology Attachment) interface but finds a serial ATA interface instead.
"As of 2009, SATA has mostly replaced parallel ATA in all shipping consumer PCs. [1]
This means that in most cases, if you choose to run Windows XP on your new laptop, you must integrate your SATA controller’s drivers into your Windows XP installation CD or else the installer will never see your hard drive. This integration process is called slipstreaming.
This guide will show you step by step how to successfully integrate the SATA controller drivers for any laptop with the Mobile Intel® ICH9M chipset into your Windows XP installation source. Although the process may be similar for other laptop chipsets , you should find out which chipset you have and locate the appropriate SATA controller drivers.
Steps

1 Locate and download the SATA Controller driver by using a search engine to find a file named “f6flpy3286.zip”
Ad

2 Extract the file contents to “%userprofile%\desktop\SATA Driver”

3 Download and install nLite. nLite is a free program which allows you to integrate software and drivers into a Windows installation source. Use a search engine to locate nLite v1.4.9.1 or download the installer from the following location:http://www.nliteos.com/download.html

4 Insert your Windows XP CD and cancel the AutoPlay menu if it comes up.

5 Launch nLite. Choose English (default) and click Next.

6 Now you must locate the installation source path. Enter the drive letter of your CD-ROM, usually "E:\" or "D:\" (without quotes) as the path to your Windows installation source. Click Next.

7 A message pops up saying "Select where to save the CD installation files for modification", just click OK.

8 Select Desktop, click Make New Folder and name it "XP Source" (without quotes). Now click OK.

9 nLite will now copy your XP installation files to the folder you created. ClickNext when this is complete.

10 You should now be at the Presets page which should be empty unless you have used nLite before. Just click Next.

11 Now you are at the Task Selection window. Click on Drivers and Bootable ISO, then click Next.

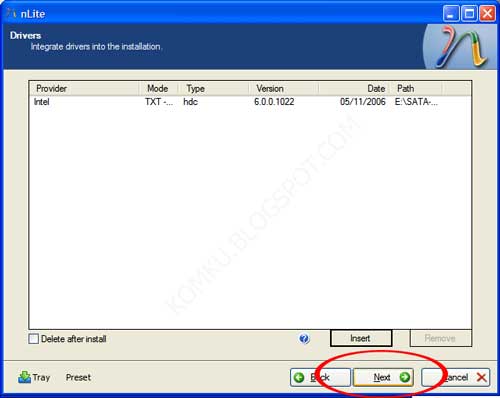
12 You have to locate our SATA controller driver here. Click Insert, and choose Single Driver.

13 In the File Name box type in "%userprofile%\desktop\sata driver\iaAHCI.inf" (without quotes) and click Open.

14 The Driver Integration Options window pops up now. Make sure Textmode driver is selected as the Mode type. Highlight "Intel (R) ICH9M-E/M SATA AHCI Controller" and click OK, then click Next.

15 A new message comes up asking "Do you want to start the process?", click Yes

16 Now nLite will integrate your drivers into your XP installation folder (%userprofile%\desktop\XP Source). When this is finished, click Next, eject your Windows CD and insert a blank CD-R

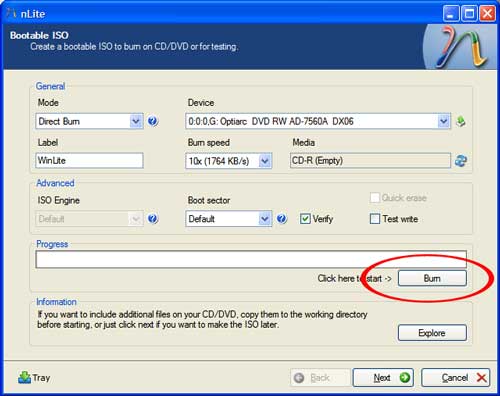
17 You should be at the Bootable ISO window. Select Direct Burn for theMode type and enter a volume label for your CD (eg. XPSP3SATA).

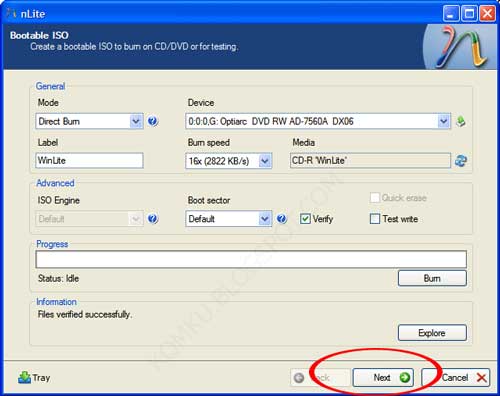
18 Now just click on Burn and wait for the CD writing process to complete.

19 Congratulations, you have successfully created a bootable Windows XP installation CD with your SATA controller drivers already integrated. You can now install Windows XP as you would normally.


